Quinoa Pudding: How A Super Food Makes A Super Dessert

IMG_3497

Our new foodie hobby is eating at diners. In all seriousness, is there anything that rivals a food joint that serves breakfast, lunch, dinner, and homemade desserts all day long? Diners are the Baskin Robbins of restaurants—there is an option and flavor for every type of eater.

A few weeks ago, while eating at one of our regular diners, the one I cook for ordered homemade rice pudding. It was absolutely divine. I knew recreating this sweet, old-fashioned dessert was inevitable, yet I wanted to experiment with the traditional form and make my rice pudding as healthy as possible. With a full pack of quinoa in my pantry, I figured why not incorporate this super food in place of the rice? The rest of the ingredients are fairly standard—milk, sugar, vanilla—and difficult to substitute with healthier alternatives without completely changing the overall taste and feel of the pudding.

So how does the quinoa pudding rival that of rice pudding? While the quinoa pudding may not taste exactly like rice pudding, it still tastes incredibly delicious—almost comparable to a dessert oatmeal, especially with the hints of cinnamon. Another plus about this dessert is that it has a versatile taste, meaning you can decorate it with almost any kind of topping(s) you can think of, however, the pudding is still very tasty and satisfying on its own. By far, the best part about my quinoa pudding is its health benefits. When you break the pudding down, it’s really not all that bad for you, making this dessert a new regular in my kitchen. I think it’s important to note that the quinoa pudding could also make a great breakfast alternative that is off the regular beaten path of standard oatmeals and cereals.

Quinoa Pudding

IMG_3506

Ingredients:

-1 cup of quinoa

-1 cup + 1 tbsp sugar, divided

-1.5 cups of 2% milk

-1/2 cup of fat-free half and half

-1 tsp of cinnamon (optional)

-1 tsp of vanilla extract

-1/2 tsp of salt

Topping Suggestions:

-Pistachios and dried cranberries

-Banana and honey

-Brown sugar, cinnamon, and nutmeg

Directions:

-First, you need to soak the quinoa. In a large bowl, combine one cup of quinoa, four cups of water, and 1 tbsp of sugar.  Let the quinoa soak for about a half hour, but make sure you stir the contents periodically. This is an important step because you want to try to eliminate the earthy smell and taste of the quinoa. With a spoon, remove any of the floating pieces of quinoa.

IMG_3446 IMG_3457

-In a medium to large pot, combine one cup of sugar, milk, half and half, cinnamon, vanilla extract, and the salt. Bring to a boil, but DO NOT turn the burner above the medium setting of heat. Burnt milk does not a good pudding make. Stir occasionally until the contents come to a boil.

IMG_3464

-Once the milk mixture comes to a boil, add in the quinoa. Let the contents come to a boil.

IMG_3466

-Once the quinoa mixture has come to a boil, lower the heat to low and let the contents simmer for approximately 30 minutes (or until the contents resemble that of pudding), stirring occasionally.

IMG_3474 IMG_3476IMG_3478 IMG_3479

-The quinoa pudding can be served both cold and warm. I topped the pudding with some of our favorite toppings, but the quinoa pudding is also very tasty on its own.

IMG_3480 IMG_3485 IMG_3487 IMG_3490 IMG_3506 IMG_3513 IMG_3504 IMG_3509 IMG_3497

-Last and most certainly not least, enjoy without guilt!

Four Different Recipes Using Chipotle’s Copycat Barbacoa

photo (18)

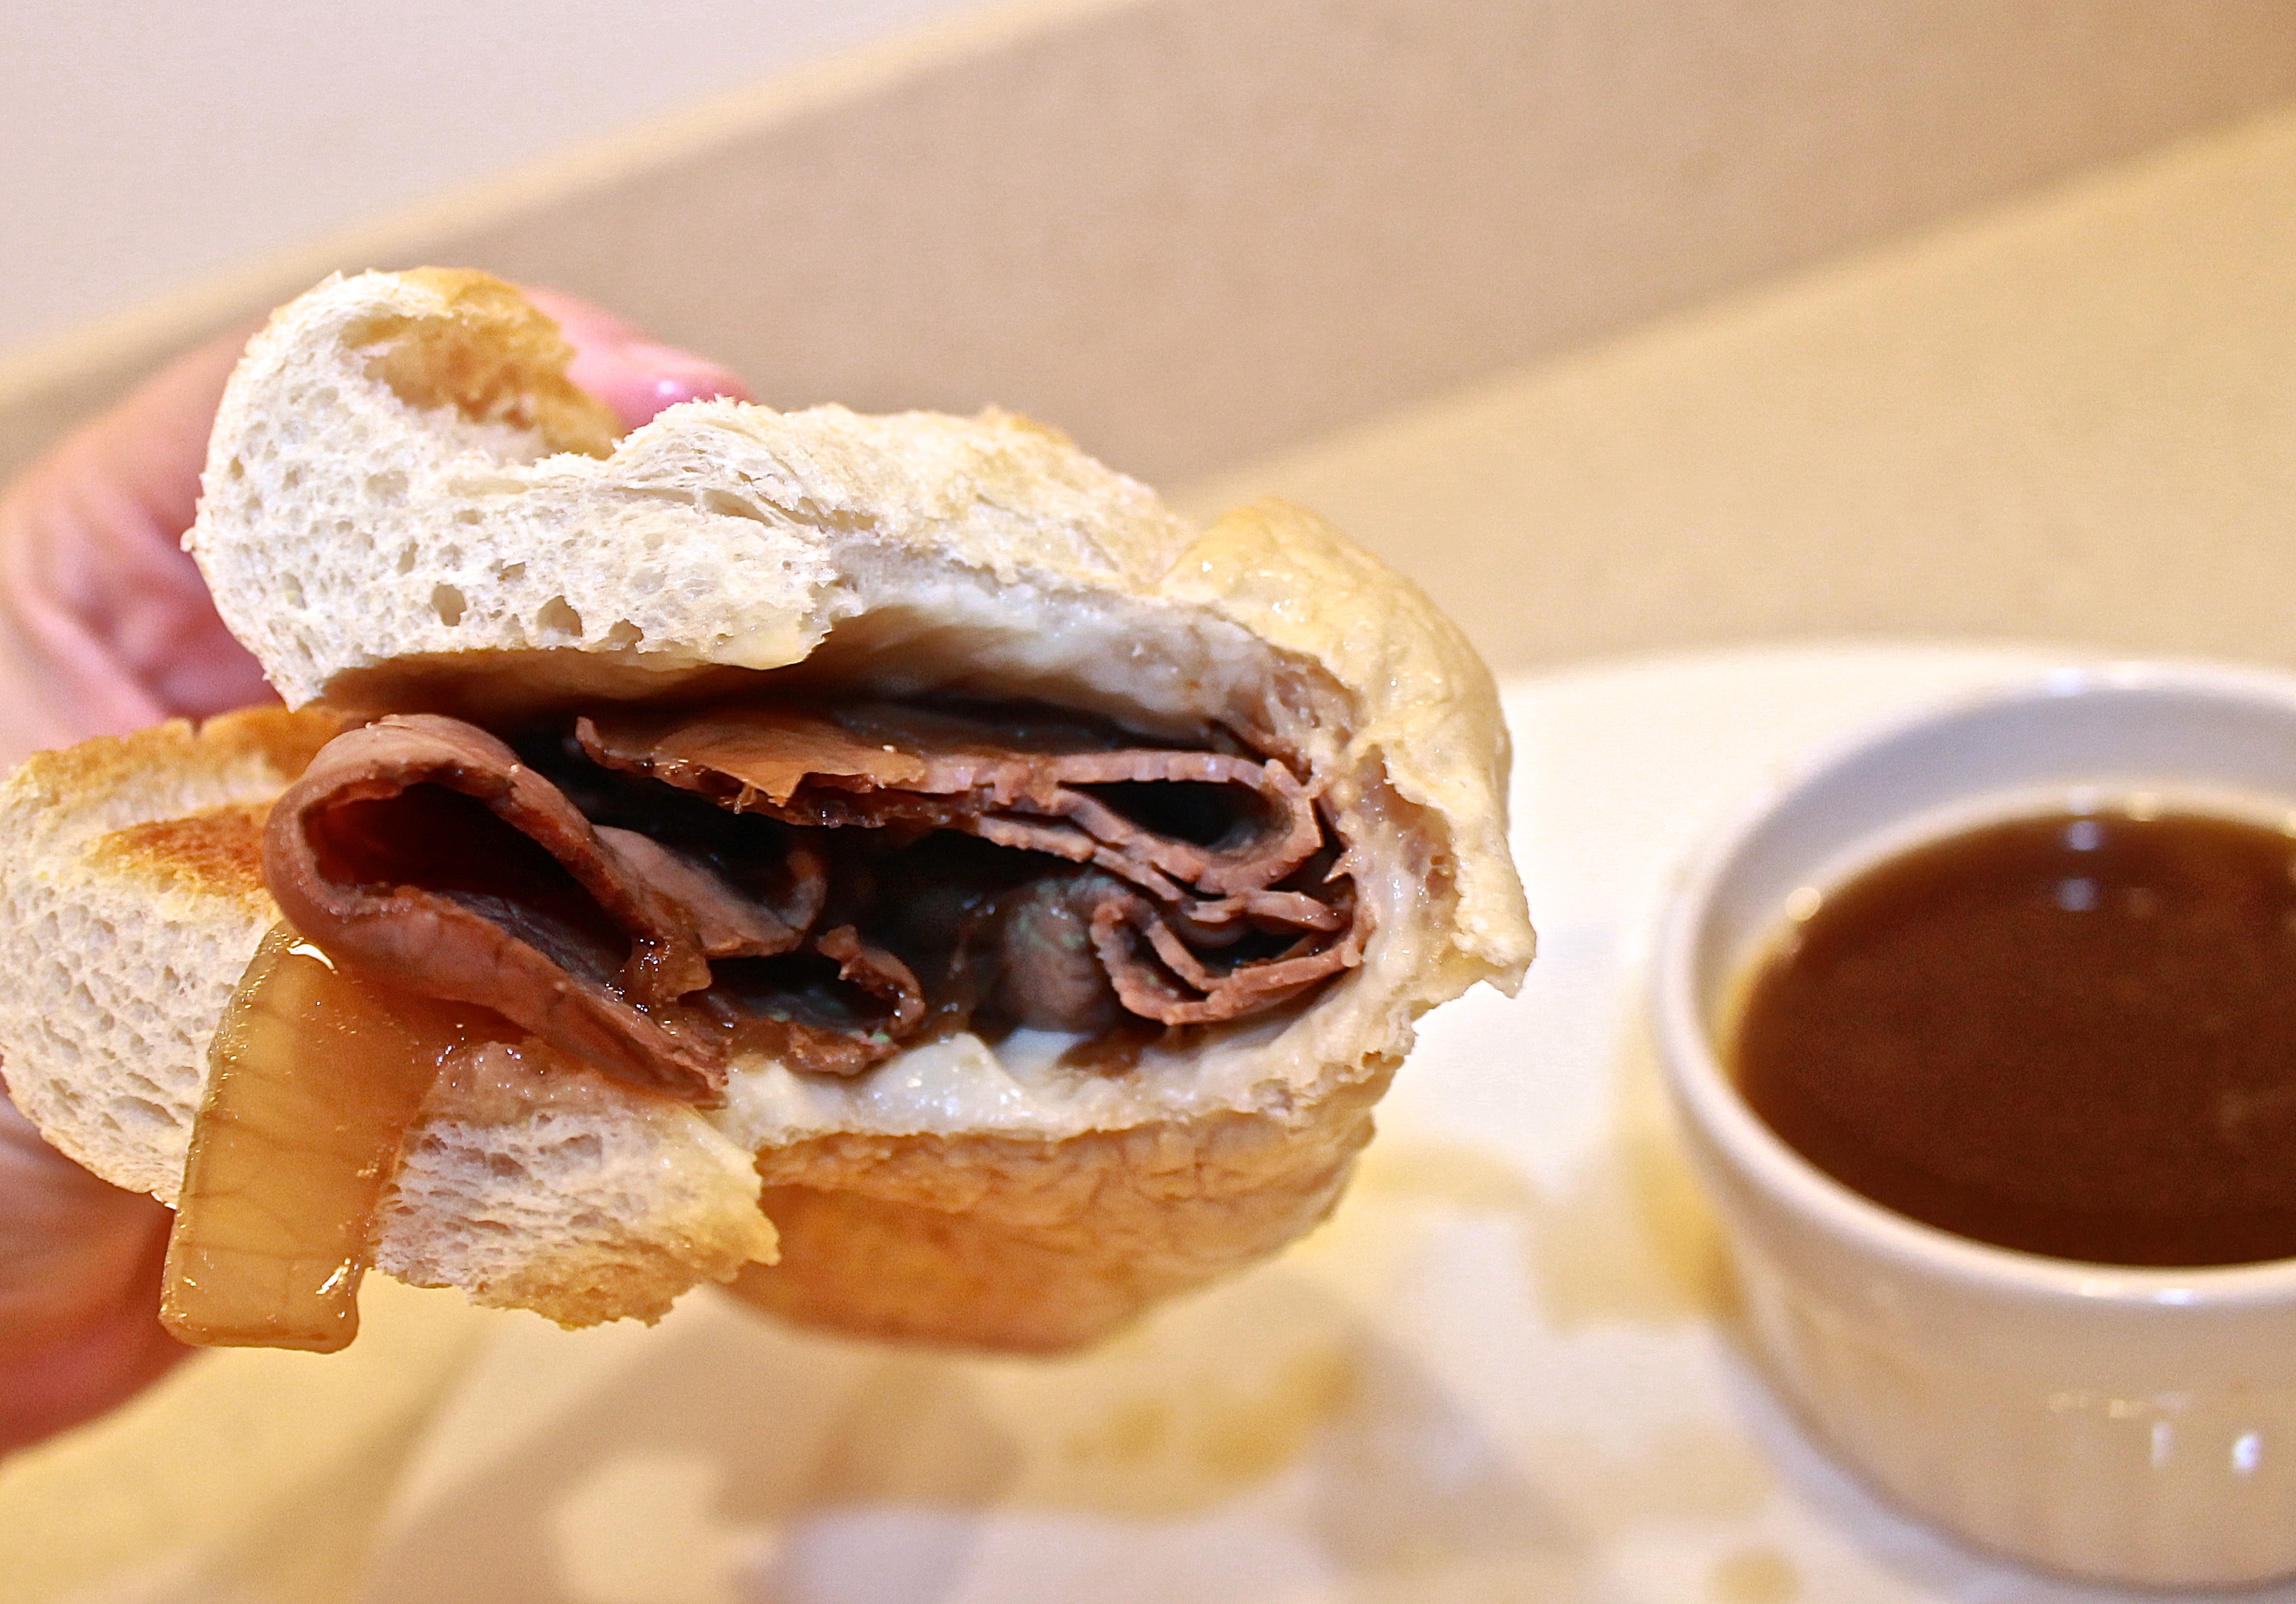
If imitation is the sincerest form of flattery, then I am about to prove how much I adore Chipotle. When we lived in Charlotte, we ate Chipotle at least once a week, sometimes two, and we never tired of it. We now find ourselves in a region where the closest Chipotle restaurant is over an hour away. Insert extremely sad emoticon. When the Chipotle withdrawal symptoms became too much to bear, I decided it was time to take on the copycat Chipotle barbacoa recipe that I’ve seen all over the internet. Thankfully for us, the outcome exceeded our expectations and we may end up surviving this Chipotle drought of ours.

This particular copycat recipe makes quite a bit of meat and we are just two people. I’m not one to throw food away, so we put the leftover barbacoa to good use. We first used the barbacoa in a Chipotle style rice bowl and it was incredible. Next, we made barbacoa tacos that were absolutely divine. At the idea of the one I cook for, we concocted barbacoa sliders, which were quite the success. And lastly, we used what was left of the barbacoa and made delectable quesadillas.

The barbacoa itself is the closest thing I’ve ever tasted to Chipotle’s version—in other words, it’s absolutely delicious. The meat can be easily utilized in many different recipes (not just the ones previously mentioned), and there is something extremely satisfying knowing that you can use the leftover meat time and time again (literally).

(Note, this is not a plug for Chipotle.)

Ingredients – Chipotle’s Copycat Barbacoa (Adapted from http://www.food.com/recipe/chipotles-barbacoa-copycat-recipe-472445):

IMG_3195

-4 teaspoons garlic, minced

-4 teaspoons cumin

-2 teaspoons oregano

-1 teaspoon fresh ground black pepper

-1 teaspoon salt

-1/2 teaspoon ground cloves

-2 tablespoons sesame oil (you can also use extra virgin olive oil or canola oil)

-1 cup chicken broth

-3 bay leaves

-3 tablespoons lime juice

-3 -4 chipotle adobo chiles

– Between 4 -5 lbs chuck roast

Directions – Barbacoa

-To create the adobo sauce, combine vinegar, lime juice, chipotles, garlic, cumin, oregano, black pepper, salt and cloves in a food processor/blender and mix until the contents are very smooth and blended. Set aside.

-Cut the fat from the roast and then cut the roast into equal pieces – about five pieces.

-Sear both sides of the pieces of roast on medium to high heat in your choice of oil. Sear until the roast browns.

IMG_3158

-Put the meat in the slow cooker and then pour the adobo sauce as evenly as possible over the pieces of beef.

IMG_3165

-Pour in the chicken broth and add the bay leaves.

IMG_3174

-Cook on the low level for at least 8 hours (in all honesty, the slower the cook time and the lower the heat level, the better the outcome).

-Once the cooking time has elapsed, shred the meat in the slow cooker with two forks. Keep on warm until you are ready to serve the barbacoa.

IMG_3195

Ingredients – Barbacoa Rice Bowls:

IMG_3242

-Your desired amount of barbacoa for your rice bowl – about a half cup or so.

-1 bag of dry black beans (this makes a decent amount, so adjust the ingredients if need be). If you prefer, you can use two cans of black beans, but they won’t taste the same.

-Approximately 5 cups of water (for the beans)

-3 cloves of garlic, minced (for the beans)

-1 small white onion, chopped (for the beans)

-Approximately 1 tbsp of fresh cilantro (for the beans)

-2 to 3 bay leaves (for the beans)

-2 tsp salt (for the beans)

-1 1/3 cups of rice (brown or white)

-2 tsp butter (for the rice)

-1 tsp sugar (for the rice)

-1 tsp salt (for the rice)

-1 tbsp cilantro (for the rice)

-1 tbsp + and extra squeeze fresh lemon juice (for the rice)

-Enough water to cover the rice

-1 medium red onion, sliced (for fajita vegetables)

-1 green pepper (for the fajita vegetables)

-1 tbsp sesame oil (for the fajita vegetables)

-Approximately 1 tbsp fajita spice mix (for the fajita vegetables)

-Approximately ½ cup water (for the fajita vegetables)

-Approximately 2 cups of cooked corn

-1 to 2 tbsp fresh cilantro (for the corn)

-Salt and pepper to taste (for the corn)

-A couple dollops of guacamole (if desired)

-A couple dollops of salsa (if desired)

-A dollop of sour cream, (if desired)

Directions – Barbacoa Rice Bowls:

-Rinse the beans. Place the beans, cilantro, garlic, onions, and s+p in a large pot. Cover with the five cups of water and bring the contents to a boil. Once the contents come to a boil, add in the three bay leaves. Cook on low to medium—there should be a constant low boil—for about an hour. Make sure to stir occasionally. Since the beans are going to absorb some of the water, you may need to add extra water to the pot. You will be able to tell because you want the beans to be covered with the water, even when they are fully cooked. The beans are ready when they are soft to the bite. DO NOT forget to take out the bay leaves once the beans are finished cooking. If you’re using canned beans, add all the ingredients associated with the beans (only a few cups of water though), and cook the contents on medium for about 20 minutes.

IMG_3199

-While the black beans come to a boil, combine the rice, butter, sugar, salt, cilantro, and limejuice in a pot or rice maker. Cover the rice with water—enough that the rice is fully submerged—and cook in the rice cooker or on the stovetop until the rice is tender.

IMG_3203 IMG_3204 IMG_3207

-While the beans and rice cook, it’s time to cook the pepper and onion. On medium heat cook the pepper in the oil for about two minutes. Stir in the onions and cook for an additional minute. Add the fajita spice and stir until the ingredients are well incorporated. Next, pour in the water and mix well. Cook the onion and pepper for about 8 minutes, or until the vegetables are at your level of tenderness.

-Next, take the cooked corn (I just used a bag of frozen corn that steams in the microwave) and put in a medium sized bowl. Mix in the s+p and cilantro and stir until the ingredients are well incorporated.

IMG_3214

-Once all the ingredients are ready, it’s time to assemble your rice bowl. There is no wrong way to do this. Lastly, enjoy!

IMG_3215 IMG_3216 IMG_3218 IMG_3220 IMG_3223 IMG_3224 IMG_3225 IMG_3237 IMG_3230

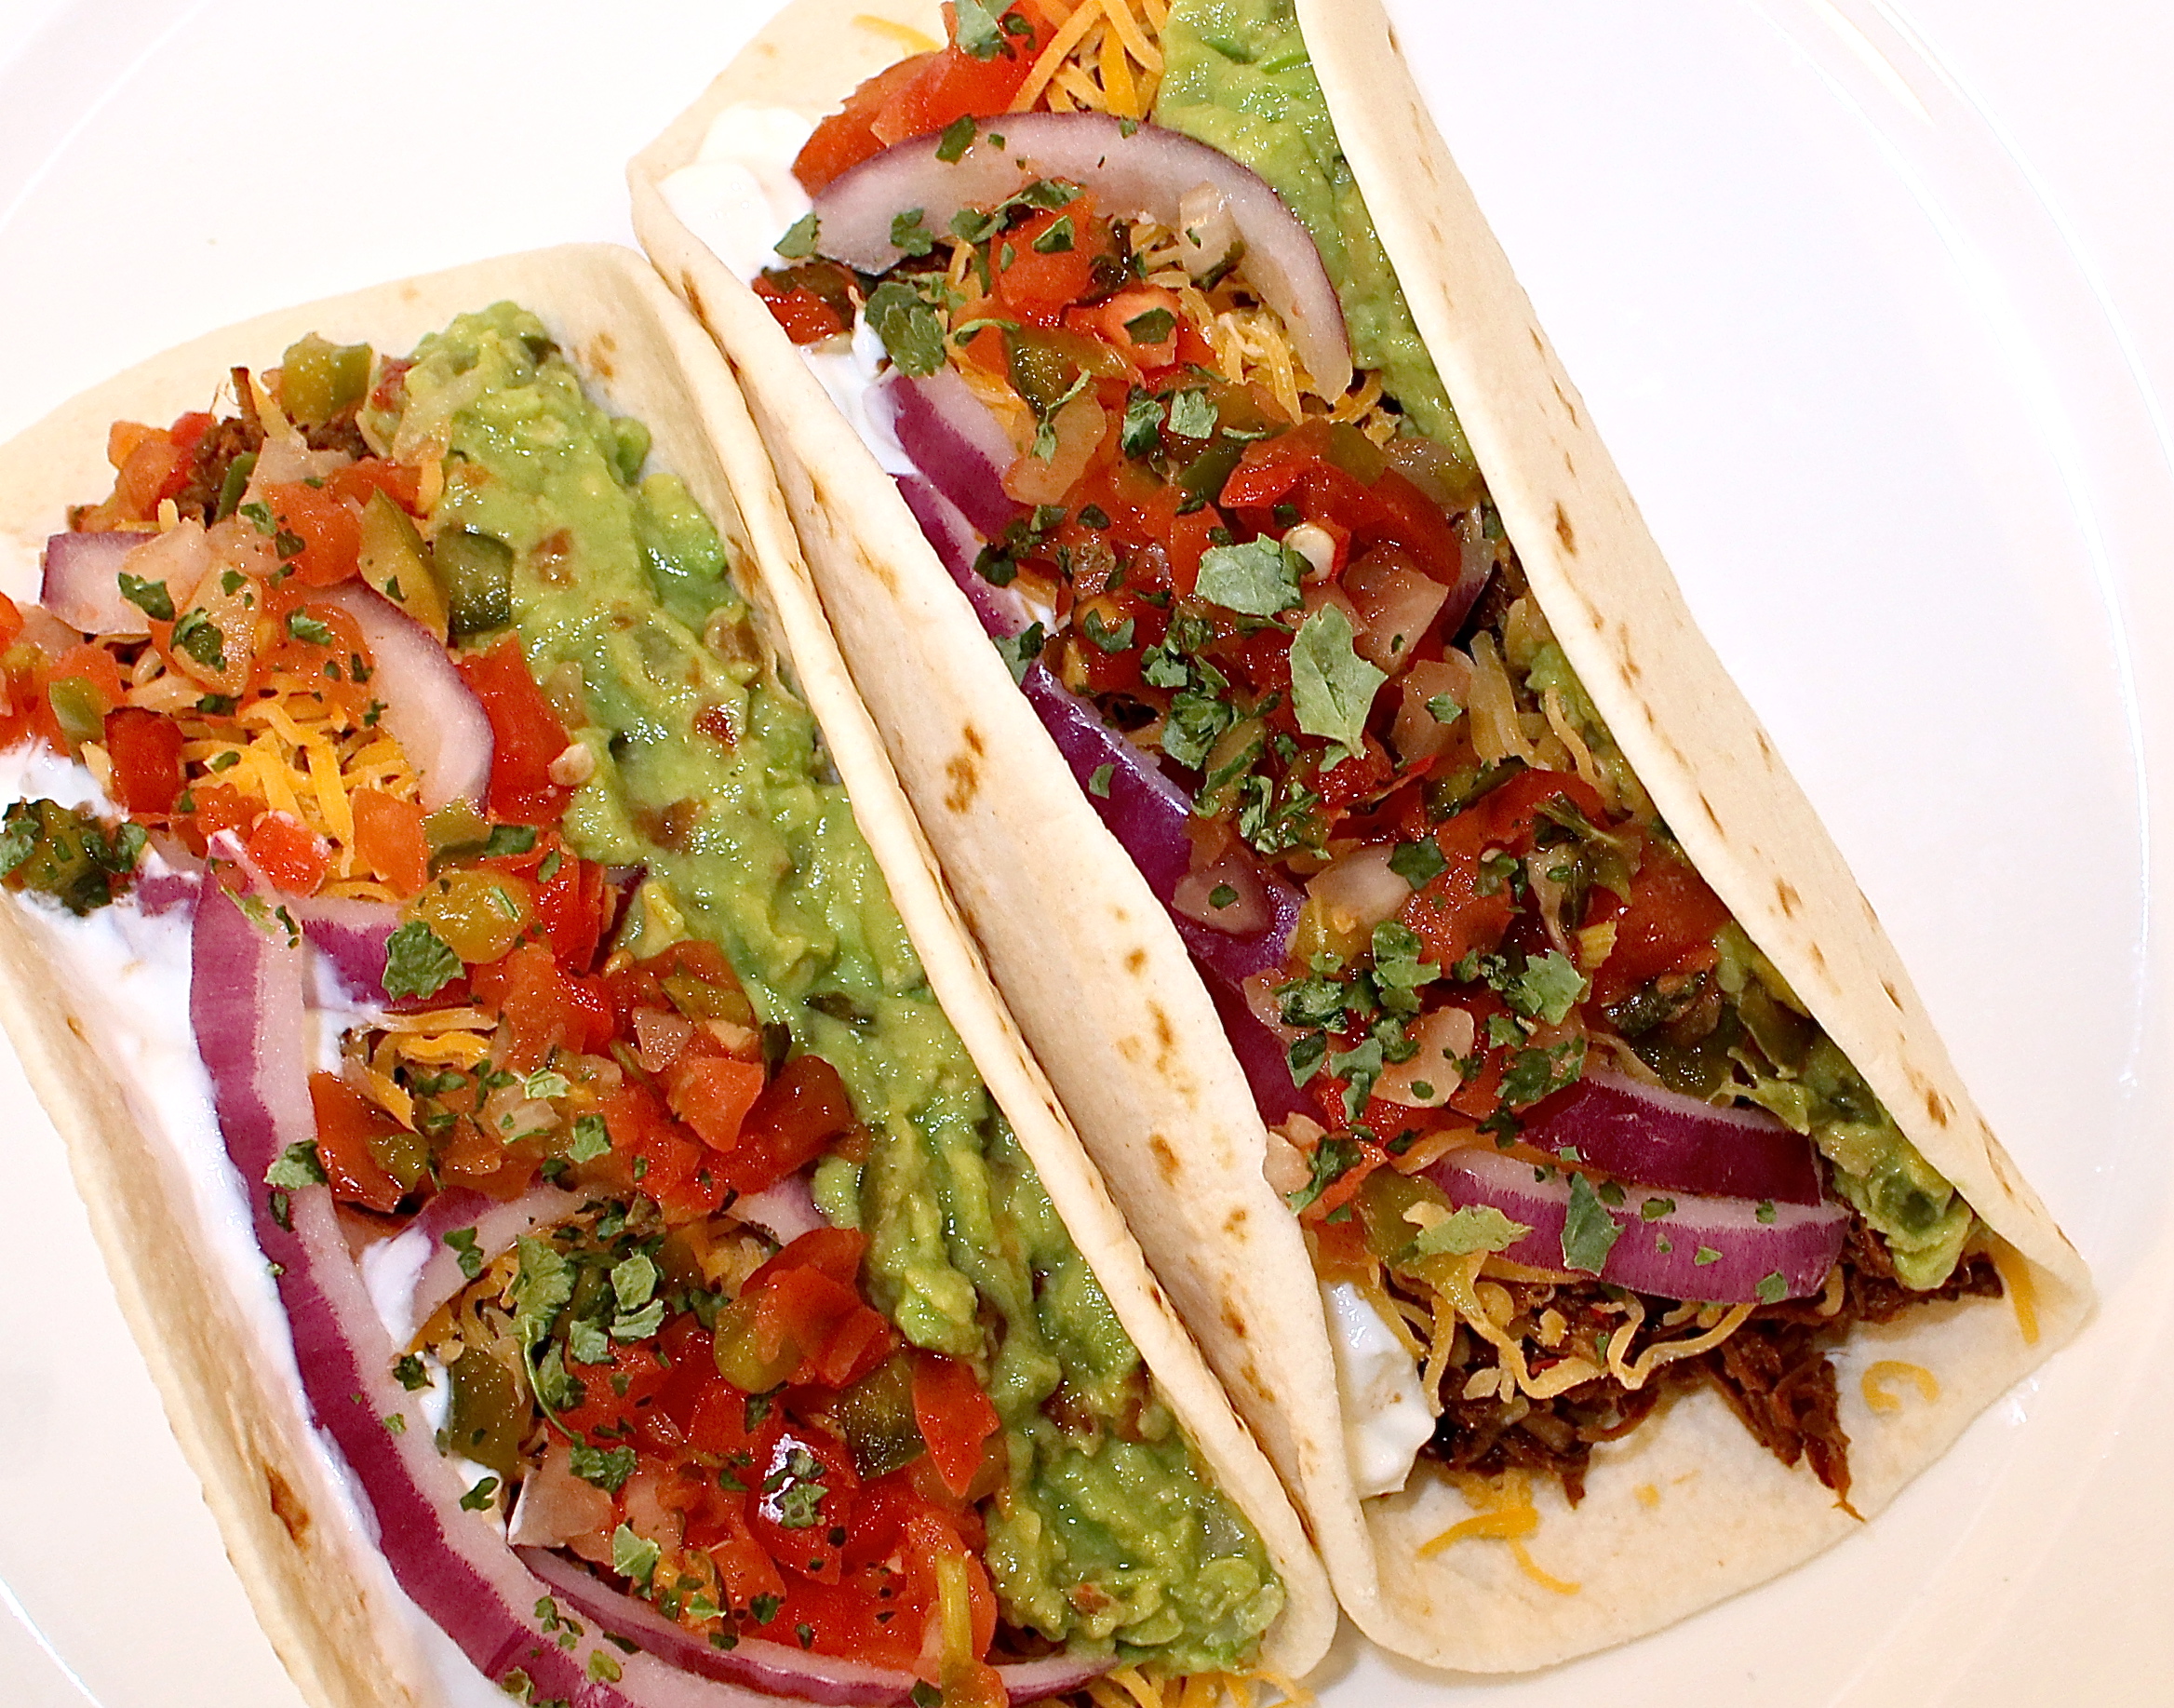
Ingredients – Barbacoa Tacos:

IMG_3331

-About ¼ cup of barbacoa per taco.

-Flour tortillas

-1/4 of a red onion

-Your desired kind of shredded cheese

-Salsa

-Guacamole

-Sour cream

-Shredded lettuce (optional)

-Fresh cilantro (optional)

Directions – Barbacoa Tacos:

*Note that there is no wrong way to outfit and eat a taco, so just consider this an optional template.

-Zap your tortilla in the microwave for a few seconds.

-Pile on the barbacoa – about ¼ cup meet per taco.

-Add on your toppings in your desired order.

-Top with some freshly chopped cilantro.

-Most importantly, enjoy!

IMG_3266 IMG_3270 IMG_3278 IMG_3281 IMG_3285 IMG_3298 IMG_3323 IMG_3325 IMG_3340

Ingredients – Barbacoa Sliders:

IMG_3351

-Barbacoa – about ¼ cup per slider

-Slider rolls

-Shredded cheddar cheese – about 1/8 -1/2 cup of cheese per slider

-Guacamole (optional)

Directions – Barbacoa Sliders:

*As with the tacos, there is no wrong way to dress your barbacoa slider.

-Spread the guacamole (or sour cream, etc.) on the top of the roll.

-Sprinkle half of the cheese onto the bottom of the roll.

-Scoop the barbacoa onto the roll.

-Top the barbacoa with some more of the cheese.

IMG_3342 IMG_3347 IMG_3348 IMG_3351 IMG_3365 IMG_3372

-Enjoy!

Ingredients – Barbacoa Quesadilla:

IMG_3394

-2 flour tortillas

-1/4 cup to ½ cup of the barbacoa meat (per quesadilla)

-1/2 to 1/3 cup of cheddar cheese (or whatever cheese you prefer)

-Butter or oil for the pan

Directions – Barbacoa Quesadilla:

-Coat the bottom of a pan large enough for the tortilla with butter or oil.

-Place the pan on a burner on medium heat.

-Place the tortilla on the pan and add half of the cheese as evenly as possible.

-Spread the barbacoa over the cheese.

-Top the barbacoa with the remaining cheese, place the second tortilla over the meat and cheese and cook – about 3 minutes each side. I always use a plate and press down lightly on the quesadilla while it cooks.

-Let the quesadilla cool before cutting it.

IMG_3381 IMG_3385 IMG_3388 IMG_3393 IMG_3394 IMG_3404 IMG_3402 IMG_3412

-Enjoy!

Quick and Easy French Dip Sandwiches

IMG_3095

Some say that the best invention known to man was the wheel, or more recently, modern medicine. While I don’t necessarily contest their importance, I feel that the sandwich should be added to the illustrious list of human accomplishments. In all seriousness, imagine your life if the sandwich had never come to fruition. What would people eat for lunch? Would there even be lunch? Would children survive without their PB&J? Don’t even get me started with the breakfast sandwich. I find the prospect of a sandwichless world very, very depressing.

I won’t bore you with a long history lesson on the etymology of the sandwich, however, I think it’s important to note that the sandwich was named after John Montagu, Fourth Earl of Sandwich. Why is this important? Well, around the 1700s, Mr. Sandwich requested his meat in between two pieces of bread because of how convenient it was—he was a regular gambler and eating a ‘sandwich’ at the gambling tables was much more conducive to his time consuming hobby than eating a formal, sit-down dinner in another part of his manor. So from day one, the sandwich has been attached to convenience.

Now let’s get to the meat of it. Dinner sometimes just seems like another chore. On nights where a long cooking session is out of the question, we like to fall back on the sandwich, in thanks to its versatility and convenience. When I crossed paths with a few quick and easy French dip sandwich recipes, I knew our next sandwich night would have to consist of tasty roast beef on a cheesy, toasted hoagie/sub roll with delectable au jus on the side. The French dip sandwiches were such a success that we have been making them weekly for the past two months. The beef and cheese combination is extremely tasty and there is nothing like dipping the sandwich into the mouth-watering au jus. Just add a salad or vegetable as a side to the French dip sandwiches, and you have yourself a quick, easy, and delicious dinner.

French Dip Sandwiches

IMG_3086 IMG_3093 IMG_3108

Ingredients (makes two sandwiches):

-1 standard can (about 2 cups) of French onion soup

-1.5 cups of beef broth

-Approximately 1 pound of medium cut roast beef (half pound per sandwich)

-2 six-inch hoagie/sub rolls

-Your choice of cheese – enough to put on both sandwiches (I used two pieces of sliced provolone)

Directions:

-Take the roast beef out of the fridge so it can come to room temperature while you’re preparing the au jus.

-Preheat your oven to a high broil (for toasting the bread and cheese).

-In a medium sized pot, combine the French onion soup and the beef broth and bring to a boil, uncovered.

-Keep the mixture at a rolling boil for about ten minutes.

IMG_3065

-During this time, place your preferred choice of cheese on the hoagie/sub rolls and bake until the bread is toasted and the cheese is melted. You want to time this right so the roast beef ends up on warm and toasted bread. It’s not the end of the world if you need to pop the bread/cheese back in the oven to ensure a toasted sandwich.

IMG_3068

-After the ten minutes has elapsed, turn the burner down to medium-low until the contents have stopped boiling (this is important because you don’t want to put the beef in when the au jus is too hot or else it will toughen the meat).

-Once the au jus stops boiling, take the meat for sandwich and dunk it in the pot for about thirty seconds—you really don’t need the beef to cook in the au jus for that long. With tongs, take the beef out and place it on your toasted bun with cheese. Make sure to grab some of the onions from the French onion soup mixture.

IMG_3071

-Repeat the last step for the second sandwich.

-Carefully ladle out the au jus into a small bowl – I used about 1/3 of a cup of au jus per sandwich – and serve on the side with the sandwich.

IMG_3076 IMG_3079IMG_3093 IMG_3110

-Lastly, Enjoy!

I Heart Raspberry Pie

IMG_2973

They say Valentine’s Day is a day of romance, but please, we all know this love fest of a holiday is all about the sweet treats and chocolate—at least it is to me. Since everyone and their mother elects to go out to dinner on February 14th, I’ve found that staying in and avoiding the crowds results in a much more enjoyable and relaxed Valentine’s Day. Consequently, Valentine’s Day has become our little excuse to eat our favorite foods for dinner, enjoy a nice cocktail, and indulge in an obligatory Valentine’s Day themed dessert—or just loads of chocolate (or both).

Due to the fact that I’m in mid-move and my kitchen is packed up into twelve different boxes, my cooking and baking has been relegated from detail and order to haphazard and low maintenance. With this in mind, I decided to make this Valentine’s Day dessert an easy one, but tasteful nonetheless.

I was lucky enough to find my pie dishes before the rest of my bake ware, which made the decision easy: a pie with a red berry filling. Since we aren’t in peak season for berries, I opted for a raspberry pie using frozen raspberries. I’ve always been impressed with the way frozen berries bake and they are extremely convenient—especially in the off-season.

A raspberry/red pie doesn’t necessarily scream “Happy Valentine’s Day,” however, a raspberry/red pie with mini heart pieces of dough serving as a top piecrust does. I used a standard piecrust and cut out mini heart shaped pieces and systematically placed them on top of the raspberry filling. Don’t have a cookie cutter? Me neither, so I entrusted my DIY skills to make one out of the end of a paper towel role. Yes, you read that right, and my paper towel heart shaped cookie cutter exceeded even my expectations.

The hearts served as a perfect pie topping and made the pie more attuned with the whole Valentine’s Day theme. Not only was my heart pie pleasing to the eyes, it tasted incredible with its perfect combination of sweetness and that hint of tart from the berries. It was an extremely easy dessert to prepare, making the experience all the more sweet.

Wishing you all have a Valentine’s Day filled with love and food!

Raspberry Pie

picstitch (1)

Ingredients + Materials:

-Smaller sized heart shaped cookie cutter (I used the end of a paper towel roll that I shaped into a heart. Wrap the edges in tin foil if you think it to be more sanitary).

IMG_3060

-Parchment paper

-2 9-inch piecrusts

-Approximately 5 cups of raspberries, fresh or frozen (if frozen, I suggest letting the berries thaw for about an hour prior to baking time)

-1 1/4 cups of sugar plus another tbsp of sugar

-1.5 tbsp lemon juice

-2 tbsp of half and half (I used fat-free)

-1 tbsp of butter, cut into thin slices

-2 tbsp of corn starch

Directions:

-Preheat your oven to 425 degrees.

-If your berries are frozen, take them out of the freezer and pour them into a colander. Leave the berries in the colander for about an hour—just enough time that some of the excess water is released.

-Pour the raspberries into a large mixing bowl. Stir in the one and a quarter cup of sugar, the lemon juice, half and half, butter, and corn starch. Mix well with a spatula until all the ingredients are well incorporated.

IMG_2928 IMG_2929

-Roll one of the piecrusts onto the pie dish. Cut off any of the extra dough from the crust, if needed.

IMG_2932

-Place a large piece of parchment paper onto a flat surface and roll the second piecrust over the parchment paper.

-With your cookie cutter (or mock cookie cutter, in my instance), cut out your heart shapes. Make sure you don’t leave too much room in between each heart, or else you may have to roll out the dough for your last few hearts. I used 26 hearts, but depending on how you place them on the pie, you may need a few more or a few less.

IMG_2939 IMG_2941

-Pour the raspberry filling onto the piecrust/pie dish.

-Place the hearts with the top of the heart touching the edge of the pie. Proceed to lay down the hearts all along the perimeter of the pie. If you need to move some of the hearts, just make sure you’re careful—you don’t want to drown the heart.

IMG_2947

-Once the outer border of hearts is complete, it’s time for the second set of hearts. You won’t be able to line them up perfectly with the border, so just try and make a second circle. You want to leave a little bit of space in between each heart.

IMG_2948 IMG_2950

-Once the second set of hearts is finished, it’s time to complete the center. I only had room for three hearts, so I placed them in the shape of a three-leaf clover.  Note that there is no wrong way to decorate the top of your pie.

IMG_2954

-Take the extra tbsp of sugar and lightly sprinkle over the top of the pie as evenly as possible.

IMG_2957

-Bake your pie at 425 degrees for 15 minutes.

-Lower the temperature to 350 and bake for additional 30 to 40 minutes or until the crust starts to brown.

-Let the pie cool for about an hour before serving (you can serve it sooner, the pie just may be a bit runny). To ensure your pie is perfectly set, let it sit out for a few hours before enjoying.

IMG_2958 IMG_2962 IMG_3052

IMG_3050IMG_2973

White Bean and Chicken Chili

IMG_2784

Preface: Chili always tastes better than it appears (in both its white and red forms).

I have never agreed with the saying, “If it ain’t broke, don’t fix it.” It would be a very tedious and bland world if everyone followed the rules and never thought outside the box—particularly in the foodie world. If it weren’t for adventurous chefs/cooks/famers, we would all be stuck eating the paleo diet (no offense to those who actually choose the paleo diet—but thanks, Monsanto, for slowly killing us with your delicious, genetically modified food!).

Confession: up until a few days ago, I’ve only ever known and enjoyed chili in its beef/tomato form. It’s always been one of those standard dishes I never switched up because I didn’t know there was an equally tasty option out there.  After spending the last couple of weeks with my father—the king of fixing (or improving) unbroken food—I figured why not mix up our chili routine and go with a slow cooker white bean and chicken chili? It has been one of the best decisions I’ve ever made in the kitchen.

Almost every white bean chili recipe I referenced appeared to look more like a soup than an actual chili, even after these recipes mentioned blending a decent amount of the cooked beans. To really thicken the white bean chili, I decided to incorporate cauliflower into the slow cooker with the rest of the ingredients, but blend it with a bit of the beans after the chili cooked to create a thicker, more realistic looking/tasting chili. Cauliflower is one of those foods that is very easy to manipulate the taste and consistency—I find it’s one of the most efficient natural thickening agents and it proved itself useful in my white chili.

My slow cooker white bean chicken chili turned out amazing! There were nuances of traditional chili with the spices and thick consistency, yet the dish took on its own chili form in the most delicious and spicy of ways. Even though there was pulled chicken and vegetables like cauliflower (blended) and zucchini, if you closed your eyes and took a bite, you would think you were eating traditional chili. After taking his first bite of the white bean chicken chili, the one I cook for responded with a simple, “Wow! You should blog about this.”

Ingredients:

-2 large chicken breasts

-5 cloves of garlic, finely chopped

-2 small white onions (or 1 large), finely chopped

-2 green peppers, chopped

-5 small tomatillos, finely chopped

-1 tbsp canola oil

-1 small to medium cauliflower head, cut into decently sized pieces and stalks chopped off (you’re going to blend the cauliflower, so leave the pieces large enough that they are easy to see/scoop out of the slow cooker)

-1 medium zucchini, halved and sliced

-1 large jalapeño, chopped. I used half of the seeds from the jalapeño, so just remember the more seeds you add to the slow cooker, the hotter the chili.

-1 can of green chilies

-1 standard pack of frozen corn

-1/4 cup freshly chopped cilantro

-1 can of cannellini beans, drained and rinsed

-2 cans of garbanzo/chick peas, drained and rinsed

-1/4 cup of light sour cream

-1/3 cup of fat-free half and half

-1 pack of chili spice (I used hot, but if you don’t like the spice, adjust the heat accordingly)

-1 white chicken chili spice pack (I used Mccormick’s)

-1/4 tsp cayenne pepper (optional—I enjoy the extra kick)

-Dash of red pepper flakes (optional)

-Approximately 4 cups of low sodium chicken broth (enough that the contents are almost covered with the broth)

-2 tbsp cornstarch

-Salt to taste

Directions:

-In a saucepan, sauté the garlic and onions in salt, pepper, cayenne pepper, red pepper flakes, and about 1 tbsp of canola oil.

-Stir in the green peppers and the tomatillos.

-Sprinkle about 1 tbsp of the chili spice and about a half of tbsp of the white chicken spice over the cooking ingredients. Stir well and cook for about five minutes on medium to high heat.

-While the peppers and onions etc. cook, lightly sprinkle each side of the chicken breasts with both the regular chili spice and the white chicken spice. The chicken should be covered as much as possible. The picture below is what my chicken looked liked with the rub/spices. You should have plenty of both spices left over.

IMG_2755

-Place the chicken breasts on the bottom of the slow cooker.

-Add in the beans, zucchini, can of green chilies, jalapeño, cauliflower, corn, and cilantro.

-Pour in the cooked garlic, onions, peppers, and tomatillos.

IMG_2757

-Sprinkle the remainder of both spice packs over the ingredients.

-Pour the chicken broth over the contents and stir well.

-Stir in the half and half and sour cream and mix well.

-Add in the cornstarch and stir well.

-Cover the slow cooker and set on your desired cooking setting. I cooked this batch of chili on the high, 4-hour setting.

IMG_2759

-Once the cooking time has elapsed, remove and shred the chicken (I always shred my chicken with two forks—I’ve found this is the easiest method). Lightly sprinkle the chicken with salt and set aside.

-Remove as much of the cauliflower as possible and place the pieces into a blender. It’s completely fine if you have some of the other ingredients.

-Remove about a cup worth of beans from the slow cooker and add them to the blender. Sprinkle in a few shakes of salt.

-Blend until the contents are smooth. If you feel you need to, add in a little bit of chicken broth to help the ingredients blend more efficiently.

IMG_2762 IMG_2765

-Add the shredded chicken and the blended ingredients back into the slow cooker.

-Let the chili cook on low for about 20 minutes. Serve warm, but let the chili cool a bit before eating. Enjoy!

IMG_2807 IMG_2790 IMG_2787

A Perfect Holiday Cookie Part Two: Double Chocolate Chip Cookies With Pistachios and Cranberries

IMG_2701

If I had an alias, it would be the Cookie Monster. I never tire of experimenting with cookie dough, especially around the holidays. I’ve baked a few holiday friendly cookies over the past couple of months, but I believe I saved the best for last with my double chocolate chip cookies with pistachios and cranberries.

These cookies have nuances of the classic chocolate chip cookie, however, the taste of the cranberry and pistachio puts these baked goodies in a world of their own. The salty trace of the pistachio counters nicely with the tart cranberry and smooth white and semi-sweet chocolate.  The cookie dough is chewy, yet the pistachios provide the perfect amount of crunch, while the double chocolate leaves you wondering what kind of flavors will burst in your mouth with each coming bite.

Lastly, and certainly not least, the double chocolate chip pistachio cranberry cookies (now that’s what I call a tongue twister) are a perfect Christmas dessert/cookie. I’ve always found it very difficult to incorporate green colored ingredients into baked goods that are natural and not loaded with unnecessary dyes and sugars. The pistachio provides a unique green that contrasts beautifully with the dark red from the cranberry and the stark white from the chocolate—it’s a look that’s off the regular beaten Christmas path, and it’s a taste that is truly distinctive and delicious.

PS: These cookies are perfect to leave out for Santa…He told me so himself.

Double Chocolate Chip Cookies With Pistachios and Cranberries

IMG_2680

Ingredients:

-2 sticks of butter, room temperature

-2 eggs, room temperature

-1 cup brown sugar

-1/2 cup granulated sugar

-1 tsp vanilla extract

-2 ¼ cups all-purpose flour

-1 tsp salt

-1 tsp baking soda

-1/2 cup white chocolate chips

-1/2 cup semi-sweet chocolate chips

-1 cup cranberries

-1 cup pistachios, chopped

Directions:

-Preheat your oven to 350 degrees. If desired, line your baking sheet with parchment paper.

-In a large bowl, combine the flour, salt, and baking soda. Mix well and set aside.

-With either a hand mixer or a standing mixer, combine the butter and sugars until well blended and creamy.

-Add the vanilla and eggs, one at a time, and continue to mix until creamy.

-Slowly pour in the flour (not all at once, but gradually) and mix until all the ingredients are well incorporated

-Pour in the white and semi-sweet chocolate chips and mix well.

-Add in the cranberries and the pistachios and mix until all the ingredients are well incorporated. The picture below is what my finished dough looked like.

IMG_2658

-Measure out about a tablespoon and a half worth of dough and place on the baking sheet.

IMG_2669 IMG_2670

-Bake at 350 degrees for approximately 12 minutes (times will vary depending on oven). If you make the cookies smaller or larger, adjust the cooking time accordingly.

-Once the cooking time has elapsed, take the cookies out of the oven to cool. I slam my baking tray down to the let the cookies settle a bit. Sounds crazy, I know, but I like the look and taste of a flatter/denser cookie.

-Let cool for a couple of minutes and then enjoy!

IMG_2700 IMG_2712 IMG_2714 IMG_2726

Gingerbread Cookie Cupcake Bites

IMG_2591

Have you ever had a fantastic gingerbread cookie? Yeah, me neither. Albeit messy, gingerbread is one of those rare foods that children are actually permitted to play with. Thus, in general, I feel that gingerbread desserts have been relegated to edible Christmas legos that make little kids happy as they build gingerbread houses and decorate them with loads of candy and frosting, however, rarely do they end up eating the actual gingerbread. But no worries—I found a way where us adults (and kids) can have a delicious gingerbread “cookie” and eat it too…

So, what happens when you take homemade gingerbread cookie dough and combine it with the idea of an inverted cupcake? You get heaven in the form of dessert and pure delight for your taste buds. I’m just going to go with my instincts here and call these sweet treats my gingerbread cream cheese frosting cupcake cookie bites (say that three times fast).

These little gingerbread cupcake cookies are a perfect holiday dessert for many reasons. For starters, they’re very easy to make. If you don’t want to go to the trouble of making the dough from scratch like me, I suggest using Pillsbury Gingerbread Cookie Dough—it’s a practical and timely alternative. These little cookie cupcakes pack in the mature holiday flavor with spices like ginger, nutmeg, cloves (optional), and cinnamon; yet they aren’t too spicy as the cream cheese frosting—which can be enjoyed with every bite, unlike real cupcakes—offsets the bold taste from the dough with a sweet and creamy touch. In addition, this dessert is very easy to personalize with your preferred holiday colored frosting and sprinkles. I kept mine simple, but never be afraid to think outside the box when baking in the kitchen.

Gingerbread Cream Cheese Frosting Cupcake Cookie Bites

IMG_2613

Ingredients:

-3 cups all-purpose flour

-2 teaspoons ground ginger

-1 teaspoon ground cinnamon

-1/4 teaspoon ground nutmeg

-1/8 teaspoon of clove (if desired; this is an optional spice)

-1 teaspoon baking soda

-1/2 teaspoon salt

-3/4 cup (1 1/2 sticks) butter, softened at room temperature

-3/4 cup firmly packed brown sugar

-1/4 cups white sugar

-1/2 cup molasses

-1 egg at room temperature

-1 teaspoon vanilla extract

-1 regular sized container of whipped cream cheese frosting (or be awesome and make your own)

-Holiday sprinkles of your choosing

*Note: you will need a mini cupcake tin, mini cupcake lining papers, and some type of utensil that can poke a hole through the mini cookie cup cake. I used the end of a corn on the cob holder, but the end of most cooking utensils will work, just be aware that you may have to work with the dough a bit.

Directions:

-Preheat the oven to 350 degrees.

-Line your mini muffin tins with cupcake liners

-In a large bowl, combine the flour, ginger, nutmeg, cinnamon, cloves, salt, and baking soda. Mix together with a whisk until all the ingredients are well incorporated. Set aside.

-Either in a standing mixer or with a hand mixer, mix together the butter and sugars until creamy.

-Add to the mixing bowl the egg, vanilla, and molasses and mix until the ingredients are well incorporated and creamy (and be careful with the molasses—it can make a mess).

-Slowly add in the flour a few cups at a time until the mixture resembles dough (the picture below is what my gingerbread cookie dough looked like when ready).

IMG_2511

-With your hands (make sure you wash them prior to this step), measure out about a tablespoon and a half to two tablespoons worth of dough. Roll the dough in between the palms of your hands until a nice little ball forms. Place the ball in the cupcake liner that’s already lining the tin.

IMG_2530 IMG_2533

-Continue the previous step until you have filled your trays. I had leftover dough and decided to freeze it for a later time.

-Bake the balls of dough for about 8 minutes. Remember, times vary depending on the oven, so make sure to watch the contents.

-About a minute after you have removed the cup-cookie, insert the utensil you decide to use into the middle of the cookie. This sounds a lot more difficult than it is. You basically want to create an even hole in the middle of the cookie, but make sure not to poke through to the bottom, as you don’t want your icing to fall through.  I find the end of my corn on the cob holders to work best, but I used to use the end of some of my cooking utensils. Don’t be afraid to work and perfect the hole with your fingers.

IMG_2544 IMG_2546 IMG_2554

-Repeat the last step until each cup-cookie has a hole-like opening in the middle.

-Next, either with a pastry bag or a ziplock bag filled with the icing with a corner cut off, fill the holes of the cup-cookie. You don’t want the frosting hanging over the sides, so be careful.

IMG_2558 IMG_2563 IMG_2565

-Sprinkle your desired holiday themed sprinkles and voila!

IMG_2574 IMG_2626 IMG_2612 IMG_2587 IMG_2594 IMG_2613

-Lastly, enjoy!

Slow Cooker Buffalo Chicken Sandwiches

IMG_2278

There are few things in the food world that go together as perfectly as buffalo chicken and blue cheese. I don’t mean to get deep, but they are soul mates and the definition of opposites attract. The heat from the buffalo chicken combined with the sharp, soft, and cool blue cheese creates a taste so unique and harmonious that there is nothing that can compare. If blue cheese and buffalo chicken were Disney characters, they would certainly live happily ever after.

Ironically, I used to loathe blue cheese—yet thankfully, nothing lasts forever, even cold November rain (and my disapproval for this particular cheese and dressing). As I’ve aged, my taste buds have altered greatly. I used to refuse to eat spicy foods, however, I now find myself obsessed with any kind of cuisine containing heat and spice. I’ve always been the type to push limits, and spicy foods are one of the ways I like to test my own personal parameters. So when I came across a few recipes for slow cooker buffalo chicken sandwiches, I knew I had to make them—and as spicy as possible. I’m not ashamed to admit it, but I definitely live to eat and not the other way around.

The slow cooker buffalo chicken sandwiches were hot and wonderful. I tried to make my sandwich as close to a buffalo chicken wing as possible by loading on crumbled blue cheese, blue cheese dressing, pieces of celery, some red onion, and Bibb lettuce for an extra crunch (and bit of coolness). If you’re not one for extreme spice, you can replace hot buffalo sauce with its milder form. The chicken is extremely lean, but you would have no idea as it’s packed with taste, and it makes me feel less guilty for loading on two different kinds of blue cheese. In addition, these sandwiches are extremely easy to prepare, making the experience that much more enjoyable. Just a bit of advice, eat the sandwiches with a large beverage by your side—don’t say I didn’t warn you.

Slow Cooker Buffalo Chicken and Blue Cheese Sandwiches

IMG_2280

Ingredients:

-3 boneless, 98% fat-free chicken breasts

-2 12 ounce bottles of Frank’s Red Hot Buffalo Sauce, or your preferred buffalo sauce (You won’t use both bottles, more like a bottle and half, so keep that in mind. Also, if you want to reduce the spice, use the milder sauce).

-¼ cup to ½ cup chicken broth (enough that the chicken breasts are almost submerged in the sauce and broth)

-2 Tbsp of dry ranch salad dressing packet

-1 Tbsp butter or margarine (if desired)

-Dash of salt

-Sandwich buns of your choice

-A few slices of red onion

-Blue cheese crumbles

-Blue cheese dressing

-1 to 2 celery stalks, chopped

-Bibb lettuce

Directions:

-Place the chicken breasts on the bottom of the slow cooker and sprinkle with a little bit of salt.

-Pour in about one and a quarter bottles worth of the buffalo sauce.

-Pour in the chicken broth (enough that the chicken breasts are completely submerged).

-Sprinkle in the dry ranch dressing and lightly stir the contents.

-Cook on low for 6 hours or on high for 4 hours.

-Once the contents have cooked, shred the chicken with two forks and place back in the slow cooker with the tbsp of butter/margarine. Mix well.

IMG_2209

-When making your sandwich, make sure to use a slotted spoon so you don’t soak your break.

IMG_2214

-Assemble your sandwich as you see fit. I chose to put the Bibb lettuce down first to act as a barrier for the liquid. I then added a bit more buffalo sauce, the blue cheese crumbles, red onion, and celery on top of the chicken. I spread the blue cheese dressing on the top bun.

IMG_2215 IMG_2222 IMG_2227 IMG_2259

IMG_2286

-Enjoy, but be warned: these sandwiches are spicy, so make sure you have a beverage by your side.

Roasted Butternut Squash, Sweet Potato, and Cauliflower Soup

IMG_2465

I feel that most of us have an idea of what we’re eating Thursday on Thanksgiving, however, I always find the few days leading up to and following Turkey Day to be those kind of “I have no idea what to eat” days—especially if you’re trying to keep things nutritious. In addition to all of the Thanksgiving eats and treats, my family is subsequently celebrating Hanukah—meaning the amount of sugary and starchy foods will be twofold for me this year. While I’m obviously looking forward to indulging, I can’t help but try to eat healthy and light until Thursday (and the few days after).

It was chilly in Charlotte yesterday, and all I wanted to do was cook a warm and hearty meal. I was craving a cheesy, creamy pasta dish, which we all know does not a healthy dish make. Trying to satisfy my rich and creamy craving, I decided to try a new soup recipe and use cauliflower as a thickening agent instead of cream. I’ve used cauliflower in soups before and have always been impressed with how thick the vegetable makes soups. Since I’ve been all about roasting vegetables this fall, I figured why not roast some of my favorite fall veggies (sweet potatoes and butternut squash), cauliflower, and garlic and make them into a thick and satisfying soup?

The roasted butternut squash, sweet potato, and cauliflower soup was both filling and satisfying. The guy I cook for said it was the best soup I’ve made thus far, and I make a lot of soups. The cauliflower successfully and tastefully made the soup almost like a bisque—yet all those calories found in bisques are not in my soup. One serving of the soup (8 ounces; 1 cup) comes out to only 85 calories, and trust me when I say that it is filling—after only one bowl, I found myself stuffed. Even if you’re not looking for a light soup, this soup can please the appetite of even the hungriest of folk. I may have just found my perfect pre or post thanksgiving dinner.

May you all have a fantastic and food/friend/family filled Thanksgiving. And to those that the holiday applies, have a Happy, Happy, Happy, Happy Hanukah!

Roasted Butternut Squash, Sweet Potato, and Cauliflower Soup

IMG_2456

Ingredients:

-2.5 cups sweet potato, peeled and cut into half inch cubes

-2.5 cups butternut squash, peeled and cut into half inch cubes

-1 medium head of cauliflower, florets only

– 4-5 cloves of garlic, peeled (feel free to add more or less depending on your preference)

-1 small or medium white onion, chopped

-Salt and pepper to taste

-Parsley to taste, about 1.5 tsp

-2 to 3 tbsp of extra virgin olive oil

-3 cups of chicken stock

-2 cups of chicken broth

Directions:

-Preheat your oven to 400 degrees

-Line two baking sheets with foil.

-Peel the sweet potatoes and butternut squash.

-Chop both the squash and potatoes into cubes of equal size. My cubes were a little over a half inch on each side. Place the cubes in a large bowl.

-Peel the garlic and add the cloves to the bowl.

-Chop the stalks off of the cauliflower and place the florets into the large bowl with the butternut squash and sweet potatoes.

-Drizzle a little bit of olive oil, about 2 tbsp, over the vegetables. Add salt, pepper and parsley to taste. You want just enough oil/s+p/parsley to lightly coat the contents. Stir the vegetables around until all the ingredients are well incorporated.

-Place the vegetables on the two baking sheets and roast in the oven for about 40 minutes. Times will vary depending on the oven, so make sure you keep an eye on the ingredients. If there is a little charring, that’s fine, but you don’t want too much.

IMG_2394 IMG_2393

-Once the cooking time has elapsed, remove the roasted vegetables from the oven and set aside to cool for about five minutes.

IMG_2396

-While the roasted ingredients are cooling, in a sauté pan, sauté the chopped onion in a couple teaspoons of olive oil (you really don’t need that much oil) and salt and pepper to taste on medium heat. Cook for about five minutes, or until the onion appears translucent.

IMG_2406

-Add the roasted vegetables, sautéed onion, and two cups of chicken stock to a blender. Blend for about 15 seconds and then add the other cup of chicken stock. Continue to blend until the ingredients are well incorporated—about 2 minutes. Depending on the size of your blender, you may need to break up the blending process up in half. If you have an immersion blender, I suggest using it!

IMG_2409 IMG_2413

-Pour the blended ingredients into a large pot and place on a burner with low to medium heat.

-Pour in the two cups of chicken broth, add a little bit of salt, and stir the soup until the ingredients are well blended. This soup is very thick, so if you want a thinner consistency, I suggest adding in some more chicken broth or water.

IMG_2418

-Let the soup cook covered on low to medium heat for about 7 minutes. You don’t want to bring the soup to a boil, so if it starts to bubble, you know the soup is ready.

-Ladle into a bowl and enjoy!

IMG_2426 IMG_2473 IMG_2482

DIY Wine Cork Wreath

IMG_2298 IMG_2363

I love wine. Who doesn’t? I started “drinking” wine at church as a child—Catholics sure do know their beverages—which is only one of the many testaments to its charm and awesomeness as an adult drink.

I also love to make things and to be crafty and creative. Rarely do I drink wine and craft at the same time as I find the influence from the spirit may have a bit of a negative impact on the quality of my craft. When I came across an impressive wine cork wreath on Etsy, I knew I had to combine my love of wine and DIYing (not to mention, by doing it myself, I was saving a pretty penny).

The DIY wine cork wreath was a fun and easy project. I ordered used wine corks off of amazon.com—sounds weird, I know, but they’re typically from restaurants—and I found the rest of the materials at Michael’s craft store. It’s such an easy craft to personalize and it really is a beautiful wreath. The warm hues, earthy tones, and the pops of burgundy from the red wine blend perfectly, leaving a warm and interesting door accessory (just think of all the stories that belong to each cork).

The entire project took me about three hours. It creates a bit of a mess and your fingers may be sore, however, the finished product is well worth it. Plus, nothing says ‘mature adult who likes to party’ like a wine cork wreath.

Materials:

IMG_0213

-Foam wreath

-Corks – I used about 225

-Toothpicks – you need the same amount of toothpicks as corks

-Burlap, at least 5 feet (another 5 feet if you want to do a bow)

-Hot glue gun

-Glue sticks – I used about a dozen

Directions:

-Poke a toothpick through the long side of a cork. Add a little hot glue around the toothpick and along the toothpick side of the cork and glue/poke it along the perimeter of the wreath’s hole. Continue until you have glued/poked the cork all the way around the inner circle/inner part of the wreath.

IMG_2290 IMG_2292 IMG_2294 IMG_2297 IMG_2303

-Next, hot glue the burlap to the outer perimeter of the wreath (you may have to cut your burlap to proper size).

-Cut more strips of burlap and glue them to the face of the wreath. You don’t need this part to be perfect—just enough coverage that you can easily hide the white foam with the corks. I lined the wreath with burlap because it eliminates the bits of stark white foam that the corks didn’t cover. You don’t need to do the last step on the backside of the wreath unless you want to. I didn’t because the backside isn’t visible to the naked eye, but it’s your choice (I didn’t even add corks to the back because you can’t tell by the way my wreath hangs on the door).

IMG_2308

-And now go to town on gluing/poking the corks into the foam. Make sure to insert the toothpick into the long side of the cork (for a majority of them) and don’t forget the glue. I started on one side gluing/poking a few corks at a time, then I would alternate decorating the different sides, always a few corks at a time.

-I didn’t have any pattern accept to follow some type of ordered chaos. You will need to do about two layers of the randomly placed corks. You really can’t mess this up unless you leave too many spaces in between the wine corks. Also, don’t be scared to cut some of the cork into smaller pieces because they can easily fit in some of the snug areas. Cutting cork is very easy with a regular chef’s knife.

IMG_2316 IMG_2317 IMG_2320

-Once you have created the two layers on the face of the wreath, it’s time to apply the uniform cork alignment to the outer perimeter of the wreath. It’s very similar to how you glued/poked the corks into the inner part of the wreath. Again, I didn’t add corks to the backside of the wreath because you can’t tell by the way I hang it on my door. Feel free to decorate the back if you want it covered in corks (I saw it as saving a few bucks since I didn’t have to buy extra corks).

IMG_2321

-I had a few gaps, so I proceeded to randomly add more corks on the wreath where I saw fit. Again, there really is no wrong way to create this type of look—just make sure you mix up the placement of the corks and don’t leave awkwardly shaped gaps that are difficult to fill or cover.

IMG_2375

IMG_2350

-If desired, add a burlap accessory. I found bunching the burlap to be much more easier and attractive than tying a bow (but blame my bow-tying skills, or lack thereof).

IMG_2363

-Display where you see fit. You may need to leave a bit of bare space on the top back part of the wreath so you can fasten it properly to any specific type of hardware you decide to use. Don’t forget, adding a holiday bow this time of year is also a good idea.

IMG_2376IMG_2363